Monday, August 6, 2012

New Adventures in Bread Making

Phew! Time to dust off the old blog and get back to it. It's been awhile, but I have been trying little new things here and there. Thanks to Pinterest, I have more ideas than ever. Ideas coming out of my ears, actually. The next time you see me, I just might be upcycling a vintage door or turning an old t-shirt into a fashionable scarf. Maybe.
 Follow Me on Pinterest

As for pies, I've decided to take my skills up a notch and take a baking class at Zingerman's Bakehouse this September. I'm so excited! You can bet your sweet bippy I'll be taking my camera to document the whole experience.

In the meantime, I have a backlog entry to share.

Baking Outside the Pan

I love fresh bread and have made a few varieties of "American sandwich bread" - honey bran with sunflower nuts, oatmeal, and cinnamon swirl. But never before have I baked bread outside of a loaf pan. Until I did!

First, I tried a King Arthur Flour bread mix for Alaskan sourdough bread. (I got this mix from my sister and brother-in-law. Thanks, Ange and Si!) The dough was easy enough to put together. The challenge was shaping the dough into boules. I read in The Bread Baker's Apprentice that this shape is important because it creates surface tension and allows bread to rise up and out; "the tight skin causes the dough to retain its cylindrical shape rather than spreading and flattening." I think my sourdough loaves rose fairly well for my first try.


Biga is Better?

Continuing my bread baking apprenticeship, I decided to try Reinhart's recipe for Italian panmarino or potato rosemary bread. (In part because I had recently acquired some fresh rosemary from a friend. Thanks, Laurel!) It was a two-day ordeal because it called for a biga, a pre-ferment used in place of regular baker's yeast. I mixed flour, instant yeast, and water until it was "soft and pliable, tacky but not sticky" with an internal temperature between 77 and 81 degrees Fahrenheit. Baking is much like chemistry, so specifics like that are very helpful.


After several hours of fermenting, I had one steamy little biga! I kneaded it down and plopped it into the refrigerator.


Day two. There was nothing really special about adding the biga to the dough. I cut the biga into small pieces, let it sit for about an hour to take off the chill, and combined it with the rest of the ingredients: flour, salt, pepper, mashed potatoes, oil, rosemary, garlic, and some additional instant yeast. I had to add quite a bit of additional flour in this step to make it "tacky but not sticky." This may have impacted the rise and density of the bread, but it's hard to be sure. After several minutes of kneading, something called the windowpane test, and another temperature check, the dough was ready for its final fermentation: two hours to double in size.

I divided the dough into two parts, shaped it into boules, dusted with cornmeal, and added the final touch: embossed rosemary on the top.


The last pre-oven step is called proofing: another two hours to bask in room temperature and double in size. Et voila!


The author warns of using too much rosemary because it can be overpowering. I don't think I used too much, but the scent of the rosemary was much stronger than the actual flavor. The aroma really came out when the bread was toasted. Maybe I'll make dinner rolls with it the next time I have leftover mashed potatoes.

Sunday, November 27, 2011

Pie #3: Turkey Day!

No, I didn't make a turkey pie. I made a pie to share with my family on Turkey Day. While it wasn't on my original list, I decided to make a dark chocolate pecan pie for the occasion. (I bought the ingredients for pumpkin pie in case I needed a plan B, though!)

This pie called for a pre-baked (or blind-baked) single crust. As recommended by America's Test Kitchen, I covered the uncooked crust with two layers of foil to prevent the edges from burning, and I "filled" the middle to keep the sides from slumping in the heat. Some people fill the middle with actual pie weights, but rice, dried beans, and pennies (unsanitary?) work, too. I don't own pie weights - and they seem like a rather superfluous kitchen item anyway - so I used white rice.


The crust bunched up in one spot, but it worked for the most part. Perhaps more rice would have done the trick.

The real filling was supposed to be added while the crust was still warm, so I didn't have time to dillydally. First, I combined melted butter, brown sugar, vanilla, and light corn syrup. To prevent the sugar from caramelizing, ATK told me to heat the mixture in a metal bowl placed in a frying pan of simmering water. I think I did this correctly, but I may have stirred too vigorously as a layer of foam formed at the top. Oh well! Next came the toasted pecans and chunks of dark chocolate just in time to be poured into the crust and popped in the oven.


As this was my first official pie gig, I was anxious about dessert time. I didn't get a chance to sample it first myself as I have with other pies, but it seemed to go over well. It was a bit too sweet for me so I don't know if this recipe is a keeper, but I'm still glad I made it.

The best part, really, was the fact that Mom didn't have to make dessert or any part of the meal this year; all the kiddos chipped in, and Dad took care of the turkey. There is much to be thankful for. Happy belated Thanksgiving, everyone!

Sunday, October 23, 2011

Pie #2: Giant Cookie

Crust: single
Filling: Toll House Cookie

Crust number two went better than my first attempt. I used a food processor again, but I was careful not to over-pulse this time. As a single crust, the amount of flour, shortening, and butter was cut in half which made the dough easier to handle overall. I didn't have to add flour - I was able to roll it out and over the pie dish on the first try. The outer edge cracked quite a bit, so I had to "paste" the trimmed edges in other spots to make it a full circle. Baking can be like chemistry, but it doesn't always have to perfect.

The filling recipe is from good ol' Mom! I just blended everything you'd expect to go in a chocolate chip cookie. Here are the simple steps:


This reminds me of being a kid and eating uncooked batter!


Here is the final product basking in the light of the oven.


You know how they say good things come to those who wait? In this case, gooey pie comes to those who don't wait. But that's not a bad thing.

Tuesday, October 11, 2011

Pie, Pie, Me Oh My!

It's been a while since my last entry, but that doesn't mean I haven't been trying new things. For one, I entered a "new phase" called graduate school! I started my M.M. in Choral Conducting at BGSU back at the end of August. I'm definitely settled in now and can devote some time to blogging again. I was going to pick up where I left off with pasta making and make spinach pasta with cream sauce, but my plans changed when I went to Patterson's and bought a half peck of Cortland apples. The temptation to slice them and envelop them in flaky, buttery goodness was too great - I wanted to make pie! It went like this.

Aspirations

Sure, I've made pies before. French silk. Pumpkin. But step one involved going to the frozen section. In other words, a big part of this pie goal for me is learning the art of homemade crust. For those of you that know my mother, you know that I have some big shoes to fill when it comes to making crust. Vicky Relitz is a master, and crust is serious business in my family. Single crust, double crust, and lattice top are all on my to-do list. As for the filling, I've got lots of ideas. I do love dessert.

Lots of Butter

My spoils from Patterson's sealed the deal: I was on my way to classic apple pie with a double crust. I put on the Beatles (get it?) and turned to my favorite cookbook: The America's Test Kitchen Family Cookbook. But judging from the amount of butter and shortening the recipe called for, I thought I was reading Paula Deen.


That's a lot of butter, folks. After I processed the lard sticks and dry ingredients, I added 6 tablespoons of ice water. (My mother always emphasizes that this water needs to be icy, not just cold!) Kneading came next followed by an hour of refrigeration.

If at First You Don't Succeed

The dough had rested and it was time to roll it out, but it didn't seem like the right consistency. It seemed too greasy, like it needed more flour, but I proceeded anyway trusting ATK's proportions. When I rolled the dough over the pie dish, it completely fell apart. Sad.


I added an extra 1/4 cup of flour, kneaded again, and it held together the second time. Success! I'm not exactly sure what happened. We'll see if I need to add extra flour next time.


Easy as Pie

The rest of the recipe unfolded as you'd expect. Nothing too out of the ordinary. Really, it was as easy as 1-2-3.


Reward

My favorite part was crimping the edge of the dough, but my favoritest part was taking it out of the oven - the smell was divine!


Two out of two taste-testers agreed that the pie turned out well. It was very tasty, but there were a couple of minor problems. The top of the crust broke very easily when I sliced into it, and the bottom of the crust was difficult to work with because of all the juice from the apples. I wonder if there's anything to be done about that. I also wonder if it really matters. Presentation isn't everything!

Monday, July 11, 2011

Ravioli

After I recovered from the fettuccine carb overload, I decided my next pasta would be three cheese ravioli. I used two recipes (and got some helpful pasta cooking tips) from my favorite cookbook of all time: The America's Test Kitchen Family Cookbook.

Of course, I started with dough. I was happier this time with how it came together - much less waste.


Next, I cut the dough into 6 parts and flattened each section into a 4-inch wide sheet at level 3 thickness. I don't have the ravioli attachment for my machine, so the remaining steps were completed by hand. I combined the ingredients for the cheese filling - parmesan, ricotta, mozzarella, egg yolk, and parsley - and portioned out heaping teaspoons of the stuff onto each pasta sheet. Next, it was fold, press, and cut.


Don't be fooled. Not all of them were pretty.


Pretty and ugly alike, I let the little pouches wait around on a cookie sheet until the water was boiling. Unfortunately, I didn't heed the cookbook's warning about sprinkling the sheet liberally with flour, so some of them tore when I transferred them to the pot. Consequently, those ravioli were waterlogged. But! Most of them turned out.

I topped the ravioli with a simple, no-cook tomato sauce (America's Test Kitchen recipe #2). Ripe tomatoes, olive oil, garlic, grated Parmesan, fresh basil, and a little salt. My favorite part of putting this sauce together was the aroma of the basil! My food processor never smelled so good.


The finished product:


Making ravioli was tiring and labor-intensive (4 hours start to finish) but overall pretty worth it. I plan to do a few things differently next time, though. I'd like to try the ravioli with a cream sauce or a pesto instead. I liked the no-cook sauce, but I think that sauce works better with a smaller noodle like penne. On the subject of sauce, I'd like to try tossing the ravioli with sauce beforehand to evenly coat the pasta. Needless to say, I'm definitely going to coat working surfaces in more flour.

Special thanks to James Allen for help with some of the photos. He was paid handsomely with a home cooked meal.

Tuesday, June 28, 2011

You Gotta Start Somewhere

Project #1: Pasta Making

I have a short list of ideas for this trying-new-things thing, and I decided, sort of arbitrarily, to start with pasta making. I've been meaning to make fresh pasta for a while. Since October, to be precise. That's when my brother and his girlfriend gave me a pasta machine as a belated birthday present. (Thanks, Ryan and Sarah!)

Step One: Open the Box

I grabbed the box off the top of the refrigerator, dusted it off, and opened it up. Here's what I found:


Thankfully, no assembly was required, but I did have to clean the machine with a dry cloth and run dough through the press and cutters. Because I needed dough anyway, I decided to go all out and make a full batch. I used the step-by-step instructions in the manual, and the video at the bottom of this page was also helpful.

Digging In

As this was my first time, I'll use a lot of pictures to show what went down. The basic egg noodle recipe is 2 1/2 cups of all-purpose flour and 3 eggs. You've probably never seen flour and eggs together before, so here's a picture:


After the flour and eggs were mostly incorporated, I transferred the sticky glob to the counter and kneaded until... I stopped. It just seemed like the dough ball had had enough. (In hindsight, I think I took the mixture out of the bowl too soon - I didn't use up all the eggs, and I wasted too much flour. I'll get you next time, Gadget!)


After letting the dough sit under a damp cloth for about 15 minutes, I cut a small portion out and ran it through the machine to collect excess oil. (Factory grease, not olive oil, people.) In the process, I got some stuff that kind of looked like pasta! This part was very reminiscent of Play-doh experiments I conducted in the early '90s.


On to the Real Stuff

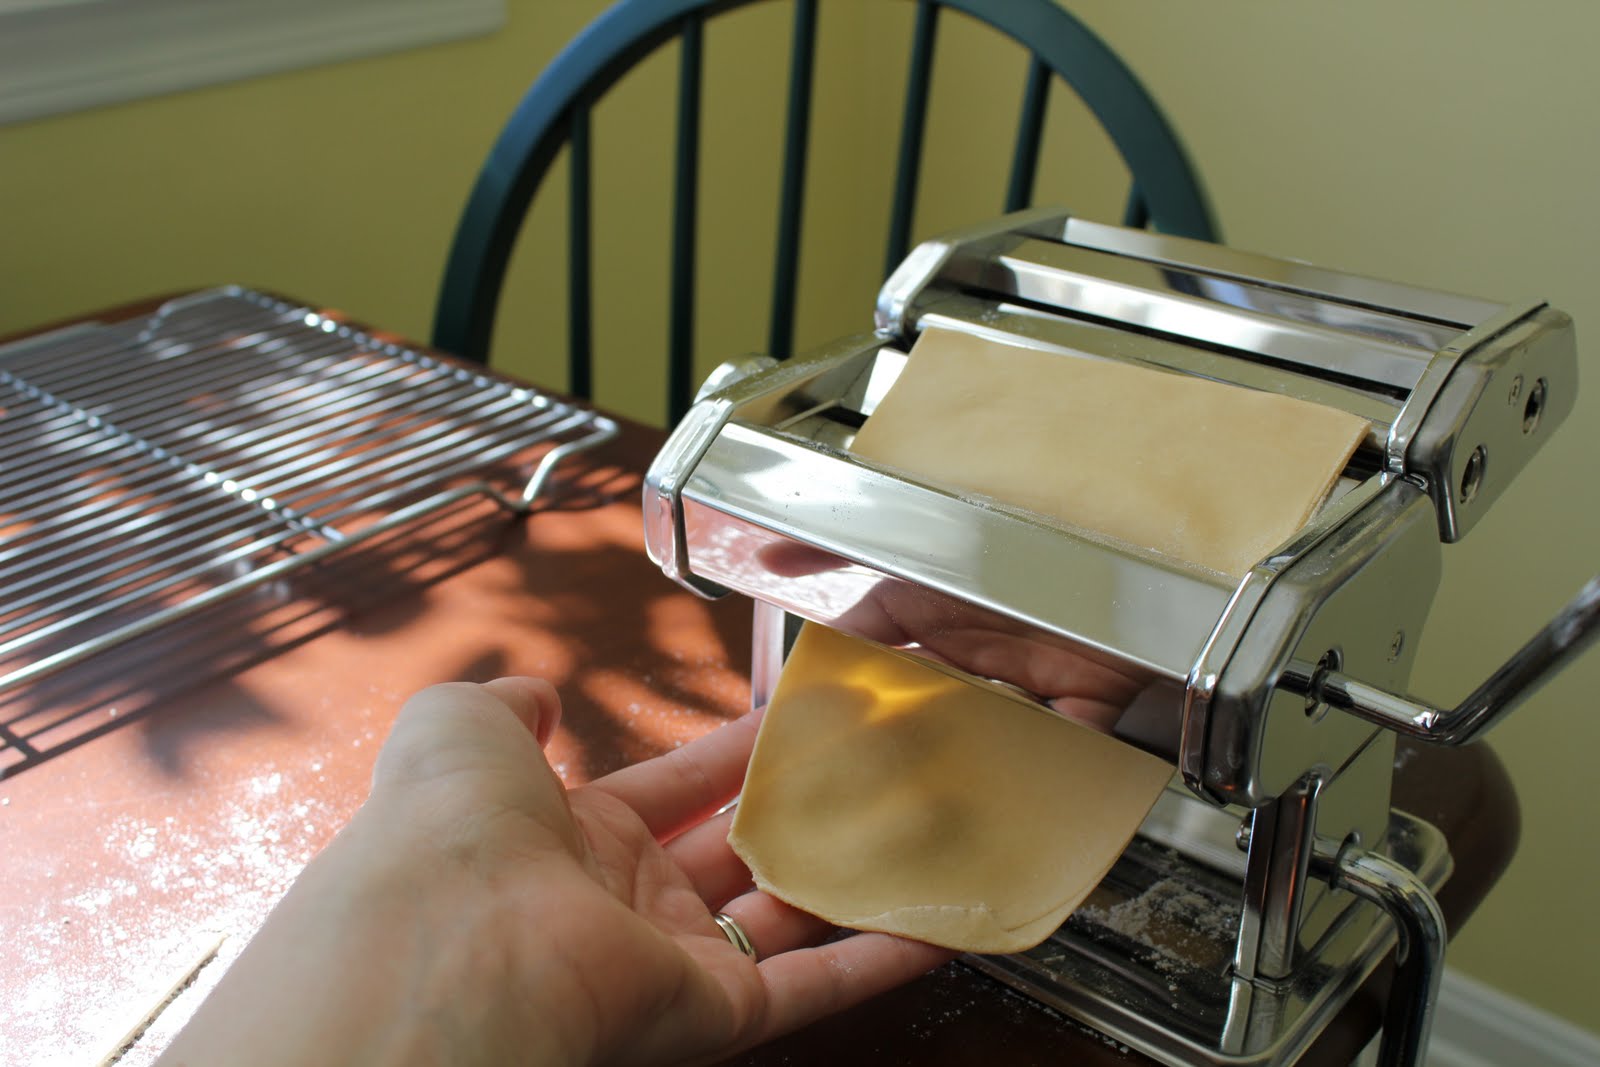
With my machine cleaned, I was ready to do some actual pressing and cutting! It turns out, the process from here isn't hard, it's just repetitive. Each section of dough must be run through the press several times until it is a long, translucent sheet. The manual said to start at "7" - the thickest setting - and gradually work down to the number I wanted. I decided to stop at "4." (Aim for the middle, that's what I always say.)


After sitting to dry for 10 minutes, I cut the sheet in half length-wise and fed it through the fettuccine cutter. The caption for this one: "Nom nom nom."


Rinse and repeat. More pressing. More cutting. Some drying. A few swats at the cat. And 2 hours later, I ended up with this pile of food-like stuff.


Which turned into this pile of definite food..


All in all, I was pleased with my first time around. It wasn't a total disaster! In fact, it was quite successful. A meal for two and then some. I'm thinking spinach-flavored noodles and fresh pesto are in my near future. Yum!

Sunday, June 26, 2011

The Goal

I've never maintained a true blog before. This is my first. It might be my last. I just hope it doesn't have a short shelf life. I'm a little nervous that this blog will be another diary that starts off with high hopes of daily attention immediately followed by crisp, blank pages. Thankfully, this blog isn't intended to be a "dear diary" type anyway. This blog isn't even the real target. It's just a way to document my actual goal: to try new things.

More specifically, my goal is to try one new thing after another. This will result in a series of new experiences, something different in the hopper at any given time. This project is intentionally broad, but I've set a few rules to give it some structure. First, each new "thing" must be a skill that I can learn and practice. Needless to say, it should be a skill of interest that I can have some success with. Second, it must be completed over an extended (but reasonable) period of time. No "one-shot" deals, and no black belt mastery. Lastly, it must be tangible enough to document online with words and photographs. To further illustrate the point, here are some reject ideas. Around the World in Eighty Chocolates? Delicious, but not a skill. How about hopscotch? Whimsical, but too simple. Learning to play tabla? Highly awesome, but too complex. ESP? Difficult to document and generally questionable.

There are a couple reasons behind this project. First, I'm totally jealous. The creative efforts of others often make me say, "I want to do that! Why can't I be cool like that person?" I have a whole closet full of untouched interests and would-be passions. This project might give me the extra incentive I need to get a move on some of them. Second, while I'll be a full-time graduate assistant in the fall, technically I'm unemployed. Aren't jobless people supposed to blog?

I hope once in a while you'll visit and read about my latest phase. Or at least look at the pictures.